Quark development environment
This guide describes some of the main features of the Quark development environment. This module assumes that you've finished the Getting Started guide.Now that you've seen Quark in action, let's see how you can configure it to get the most out of it.
Just like many other code editors, Quark adopts a common user interface and layout of an explorer on the left showing all of the files and folders in your project, an editor on the right showing contents of the file you've opened.
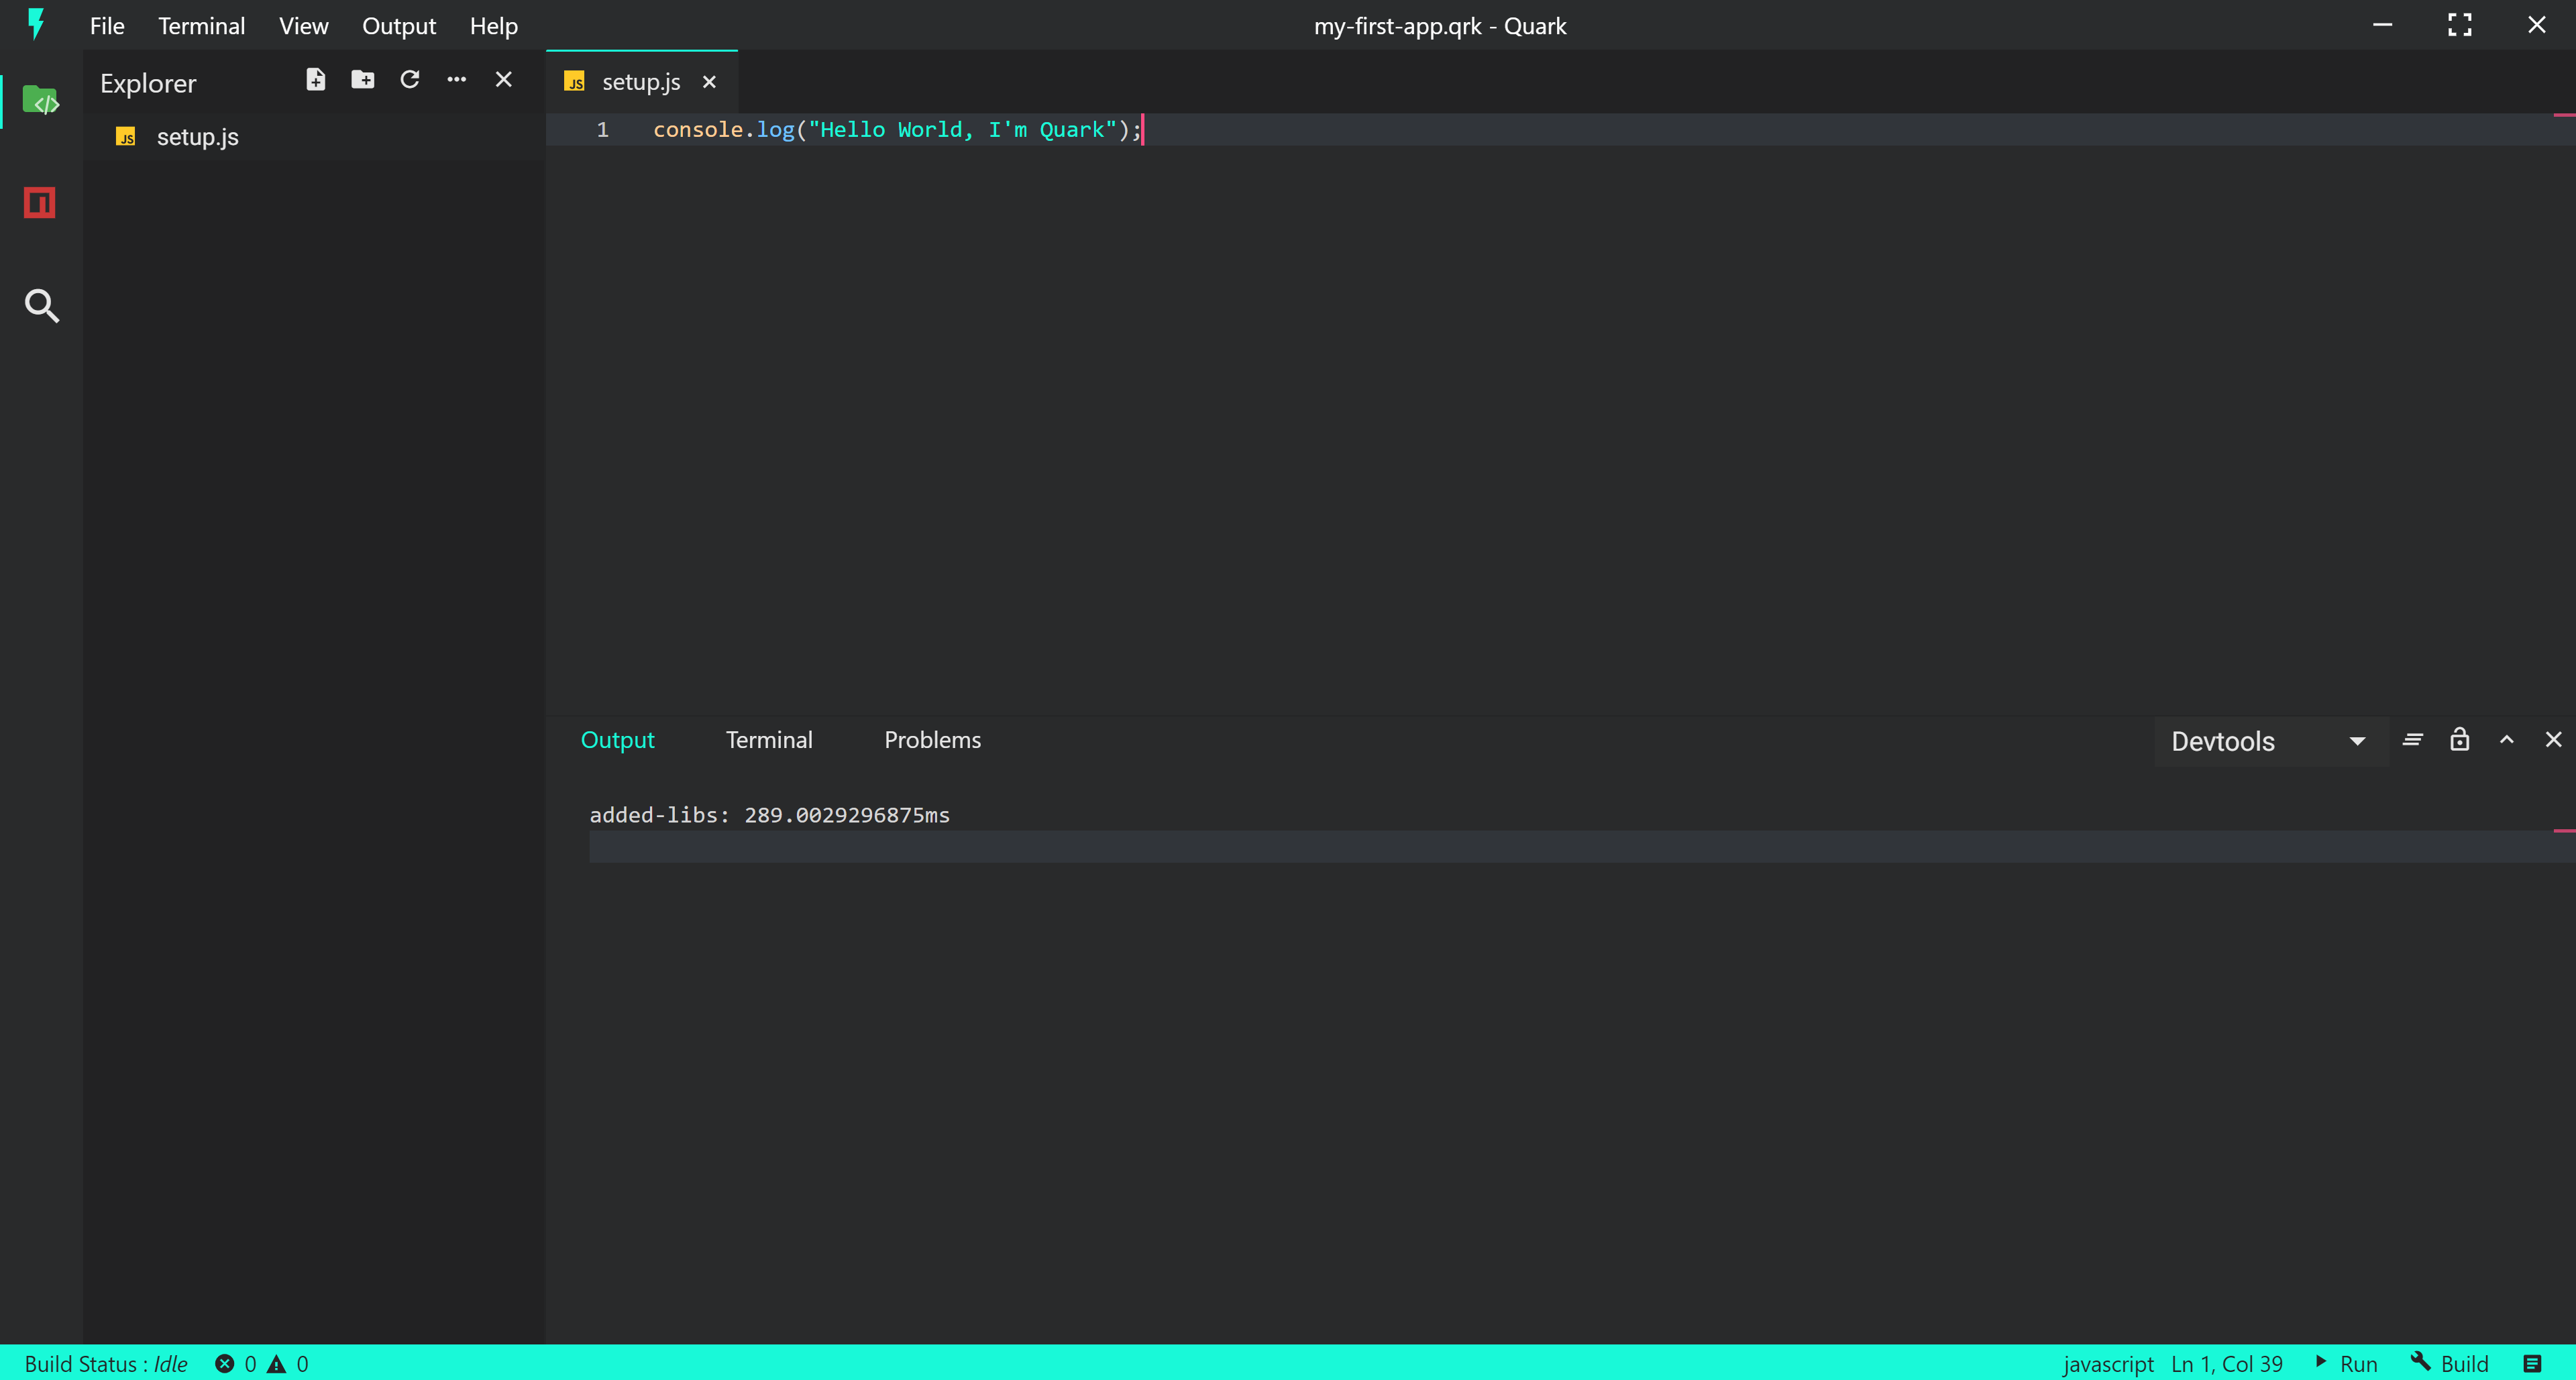
When you launch Quark project for the first time, you should get a screen that looks like this:
Basic Layout
The IDE comes with a simple and intuitive layout that maximizes the space provided for the editor while leaving ample room to browse and access the full context of your folder or project. The UI is divided into five areas:
- Editor - The main area to edit your files. You can open as many editors as you like side by side. Quark IDE uses the same code editor that powers the VS Code.
- Side Bar - Contains different views like the Explorer to assist you while working on your project.
- Status Bar - Information about the opened project and the files you edit.
- Activity Bar - Located on the far left-hand side, this lets you switch between views.
- Panels - You can display different panels below the editor region for output or debug information, errors and warnings, or an integrated terminal.
Code Editor
Quark comes bundled with Monaco code editor which is the same code editor used in VS Code. Monaco editor provides rich IntelliSense, validation and out of the box support for for HTML, CSS, SCSS, JSON, JavaScript and TypeScript.
Explorer
The Explorer is used to browse, open, and manage all of the files and folders in your project.
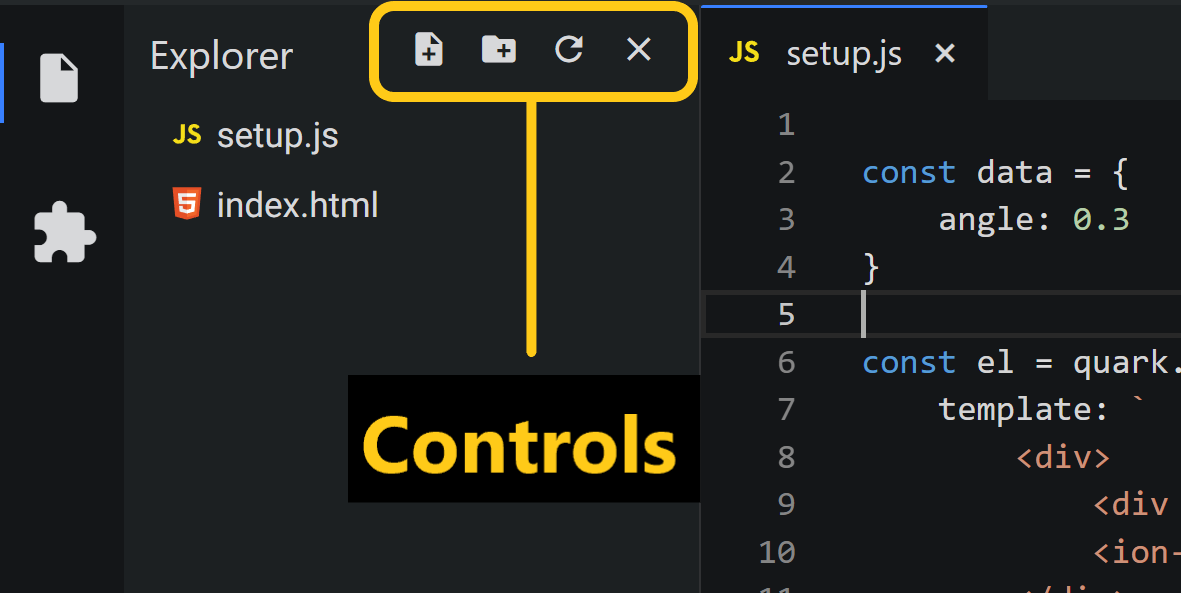
Here are the following things you can do in explorer:
- Create, delete, and rename files and folders.
- Move files and folders with drag and drop.
- Use the context menu to explore all options.
Virtual File System
One of the unique capabilities of Quark is that is uses virtual file system, sometimes also referred to as in-memory file system. That means all the code that you write and files you create inside the IDE are virtual files with no foot print on your real file system. This is done to make sharing a project as easy as sharing a single file.
Quick Open
If you press Ctrl+p a search box will open. This will let you quickly search and open any file in your project by typing the name of the file.

Command Palette
If you press Ctrl+Shift+P while focused in an editor pane, the command palette will pop up. This is a search driven menu that gives you access to just about any major task that is possible in Quark. Instead of clicking around all the application menus to look for something, you can press Ctrl+Shift+P and search for the command.
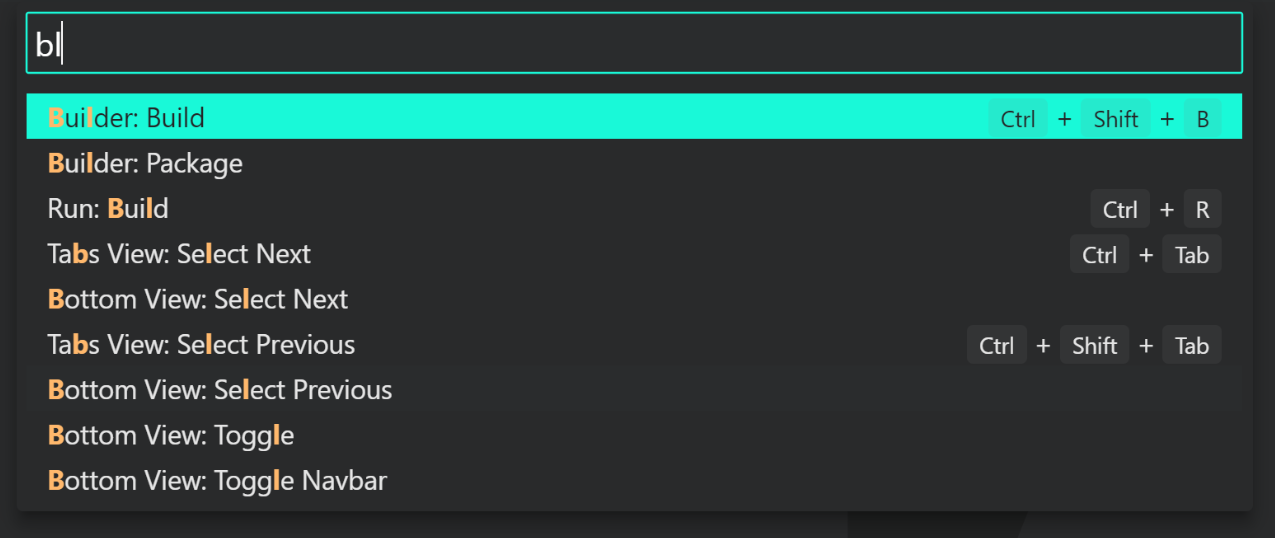
Not only you can quickly search through hundreds of commands, but you can also see if there is a keybinding associated with it. You can use these keybindings to execute the command.
Terminal
In Quark, you can open an integrated terminal, initially starting at the root of your project. This can be convenient as you don't have to switch windows or alter the state of an existing terminal to perform a quick command-line task.
To open the terminal:
- Use the
Ctrl+\keyboard shortcut with the backtick character. - Navigate to main menu and select
Terminal > Fork Terminal. - From the Command Palette (Ctrl+Shift+P), use the
Terminal: Fork Terminalcommand.
Managing multiple terminals
You can create multiple terminals open to different locations and easily navigate between them. Terminal instances can be added by clicking the plus icon on the top-right of the TERMINAL panel or by triggering the Ctrl+Shift+` command. This action creates another entry in the drop-down list that can be used to switch between them.
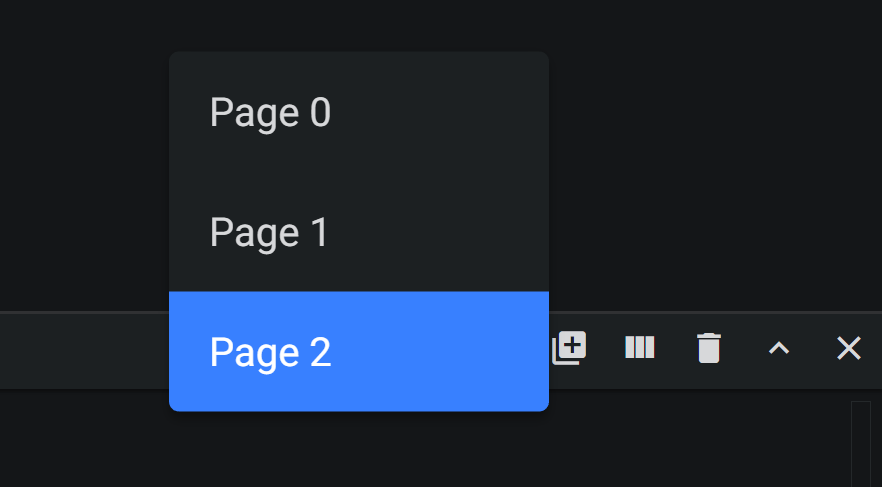
- Remove terminal instances by pressing the trash can button. The terminal instance last focused on gets deleted.
- You can also split the terminal by triggering the
Ctrl+\command or by pressing the Fork Terminal button or from the main menu.
Configuration
The shell used defaults to $SHELL on Linux and macOS, PowerShell on Windows. This can be changes in settings by going to Terminal > Process > Shell:*
Settings
It is easy to configure Quark to your liking through its various settings. Nearly every part of Quark's editor can be changed to your liking.
Quark provides two different scopes of settings:
- User Settings - Settings that apply globally to any instance of Quark you open.
- Workspace Settings - Settings stored inside your workspace and only apply when the workspace is opened. These settings are stored in the
.quark/${project-name}.store.qrkfile at the root of your project.
You can change the scope of settings by selecting the appropriate option from the select box at the top right corner of the settings window.
NOTE
Workspace settings take priority over user settings.
You can open the settings as follows:
- Go to
File > Preferences > Settingsor trigger theCtrl+,command. - Or, Open the Command Palette and select
Preferences: Open Settings
Settings groups
Common settings are grouped together so that you can navigate through them easily.
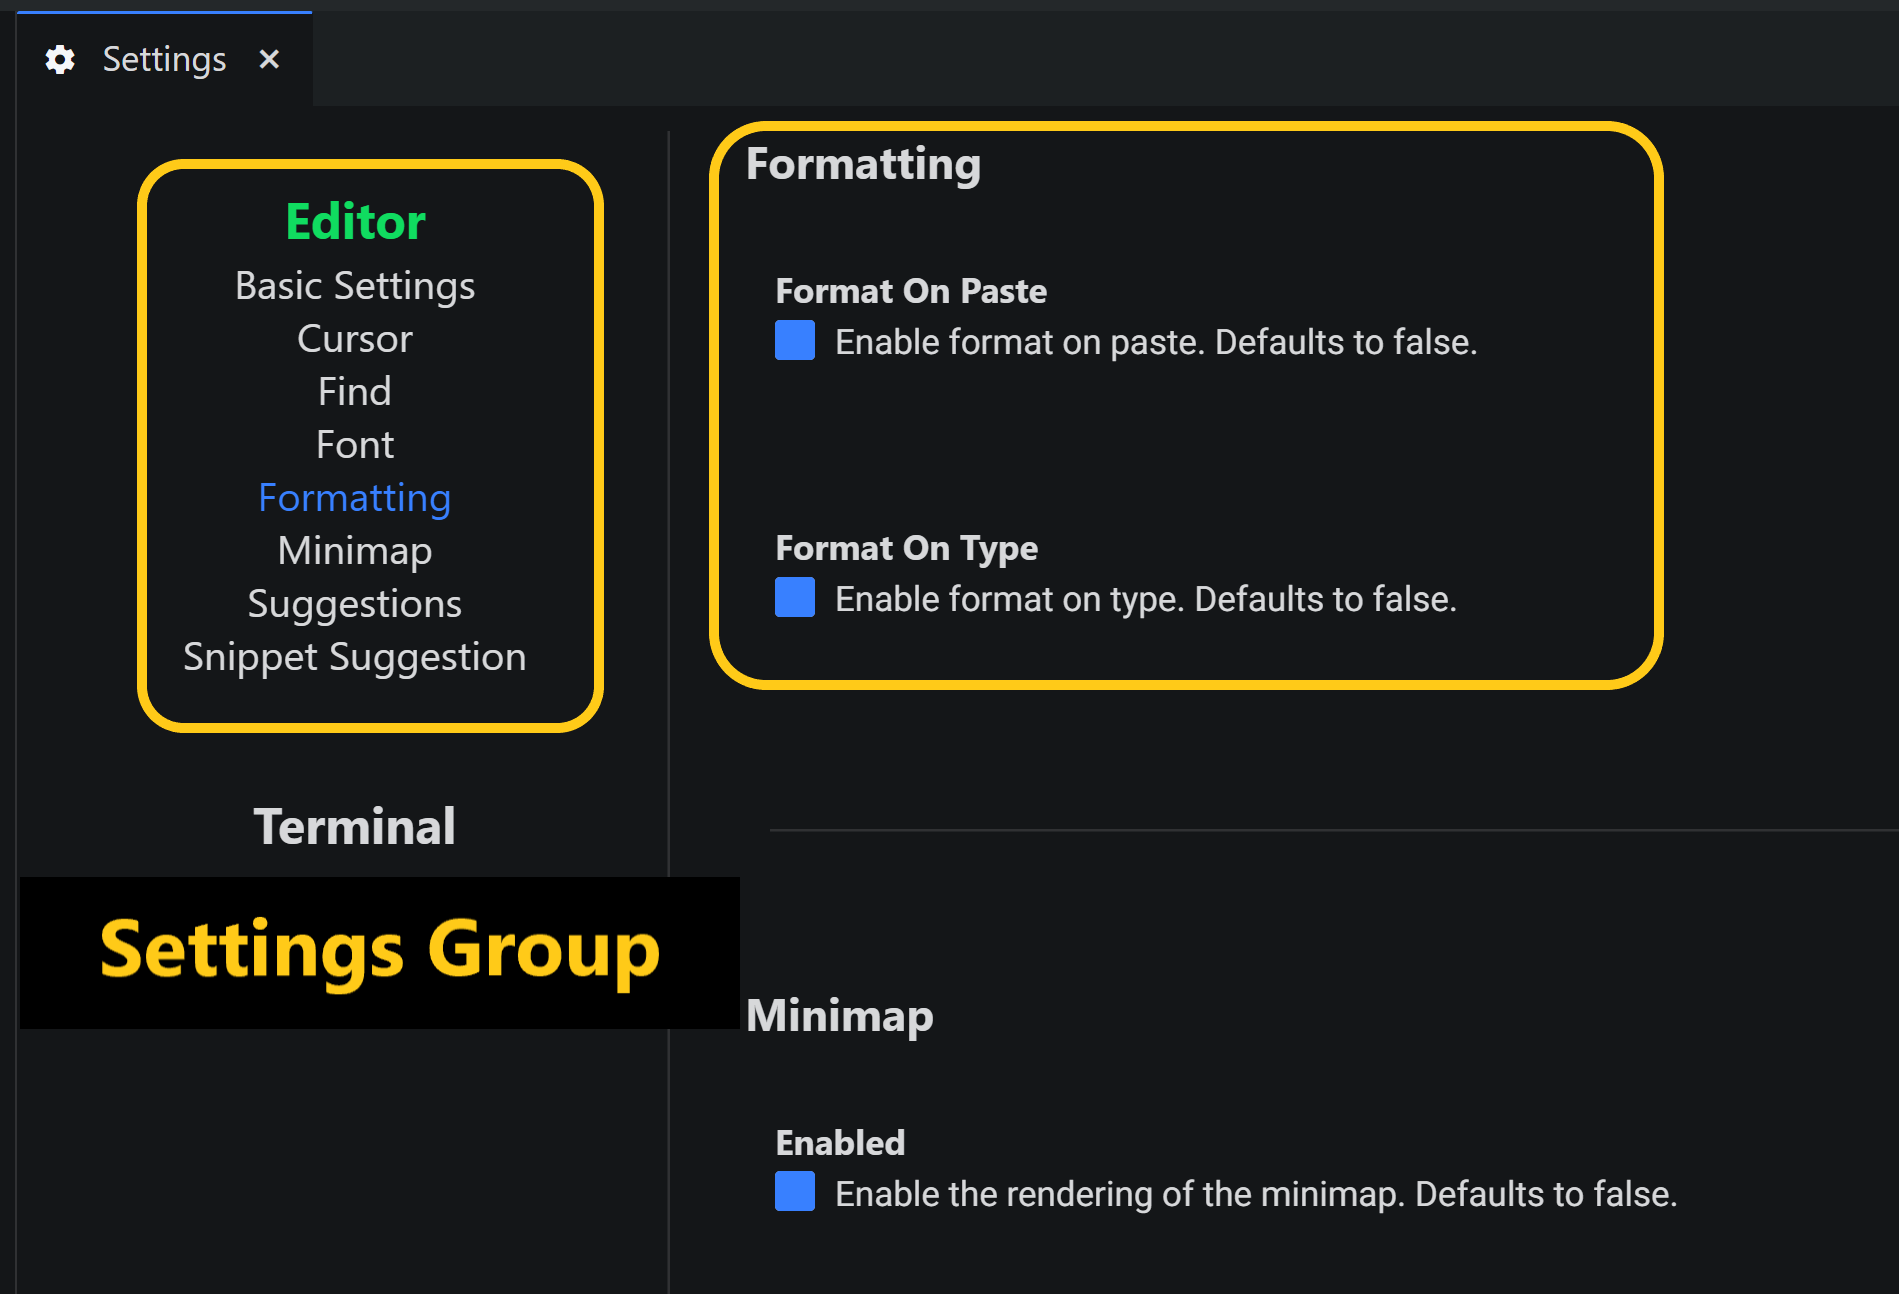
Edit Settings
Each setting can be edited by either a checkbox, an input or by a drop-down. Simply edit the text or select the option you want to change to the desired settings.
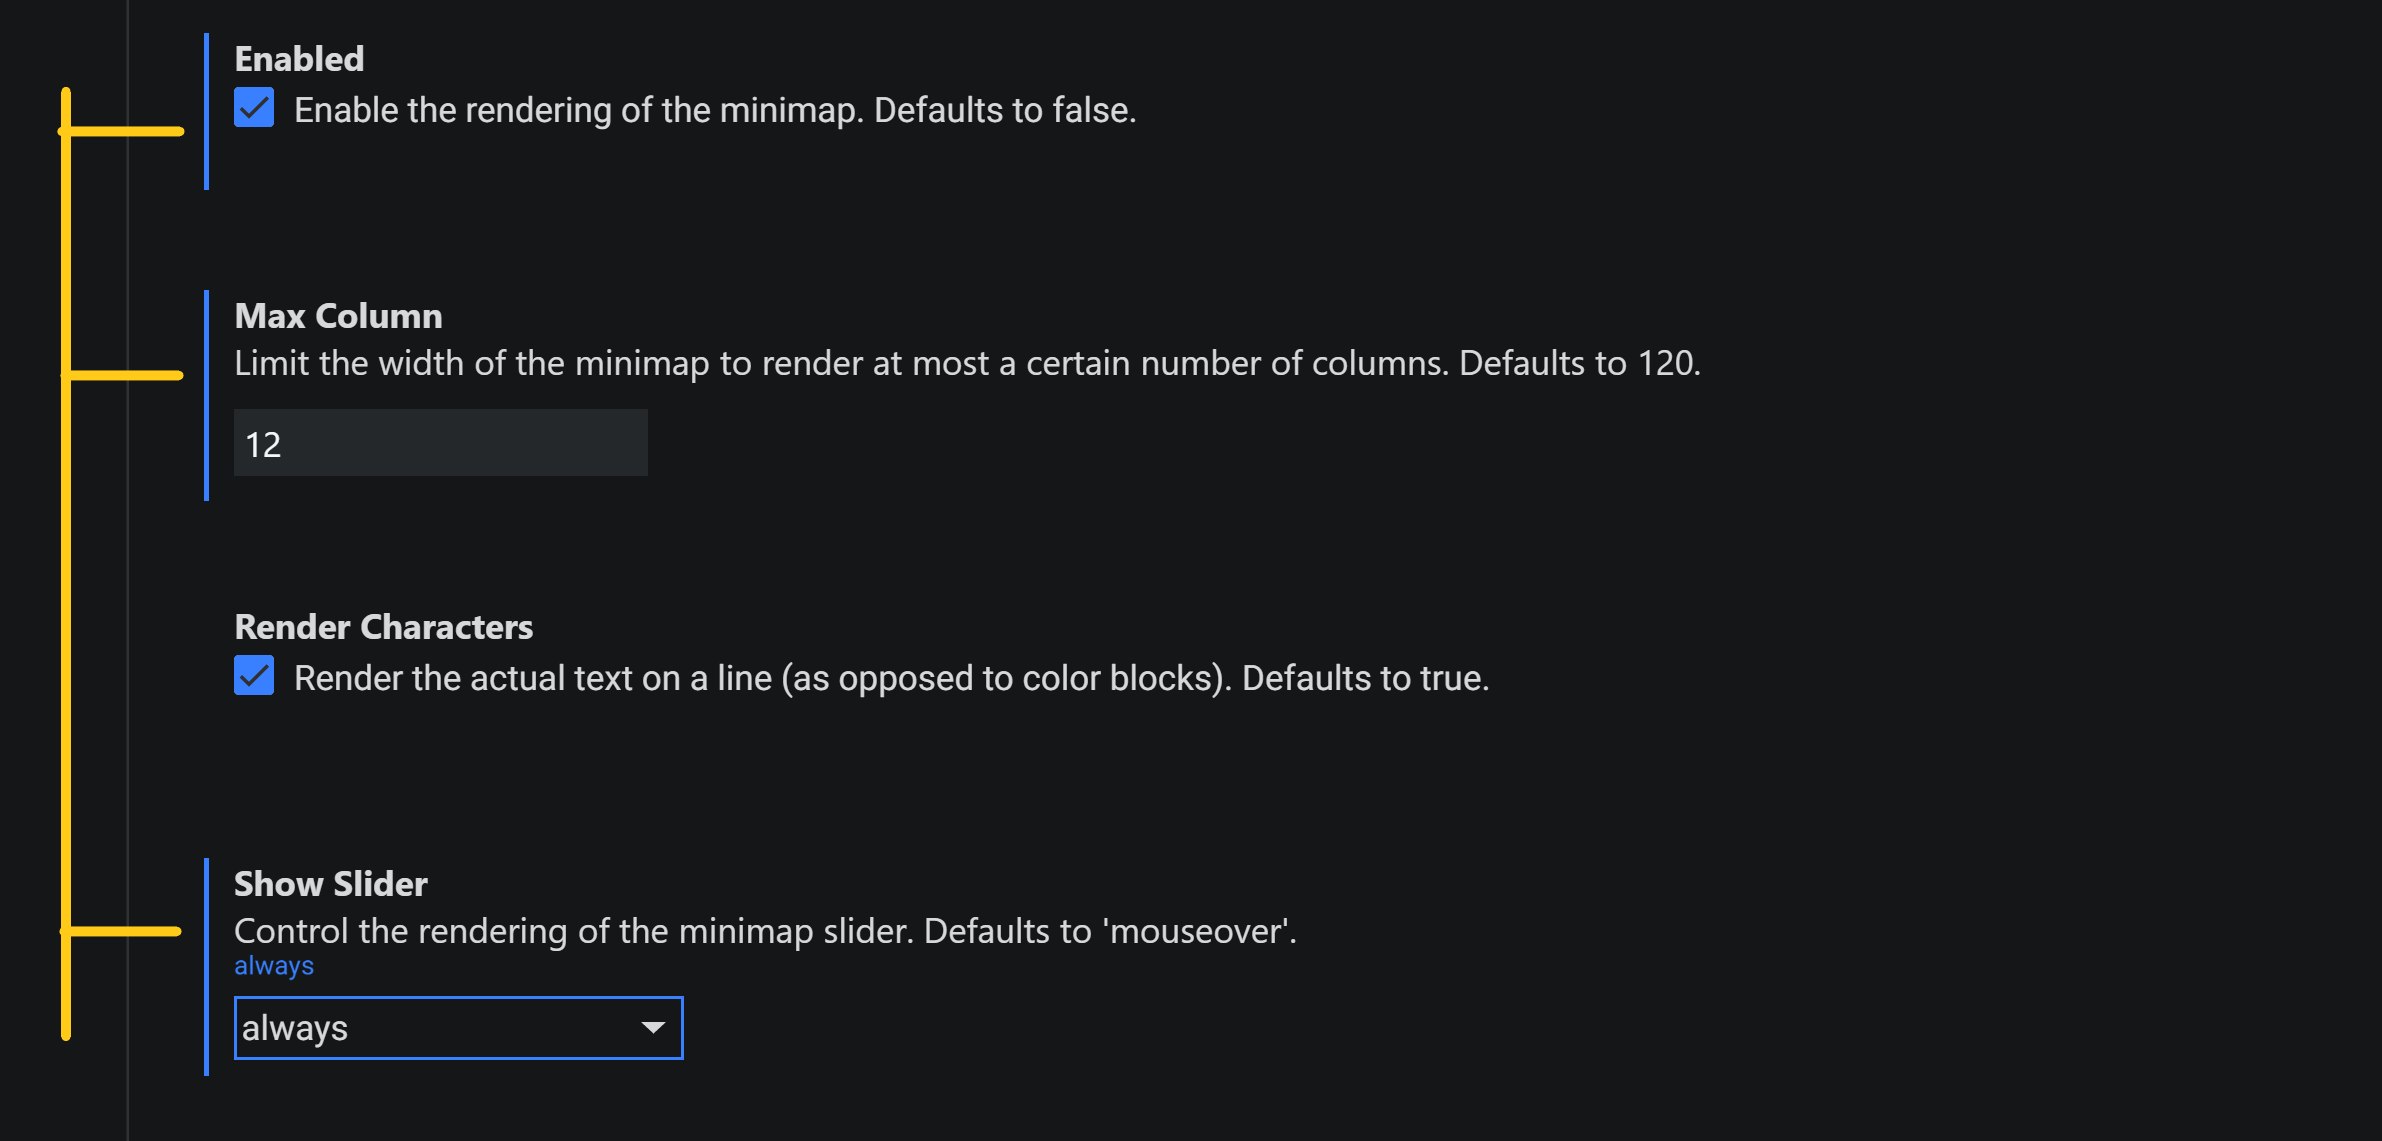
NOTE
Note that changed settings have a marker besides them to help you identify them easily.
Changing the theme
You can change the theme by changing the setting Editor > Basic Settings > Theme of Editor.
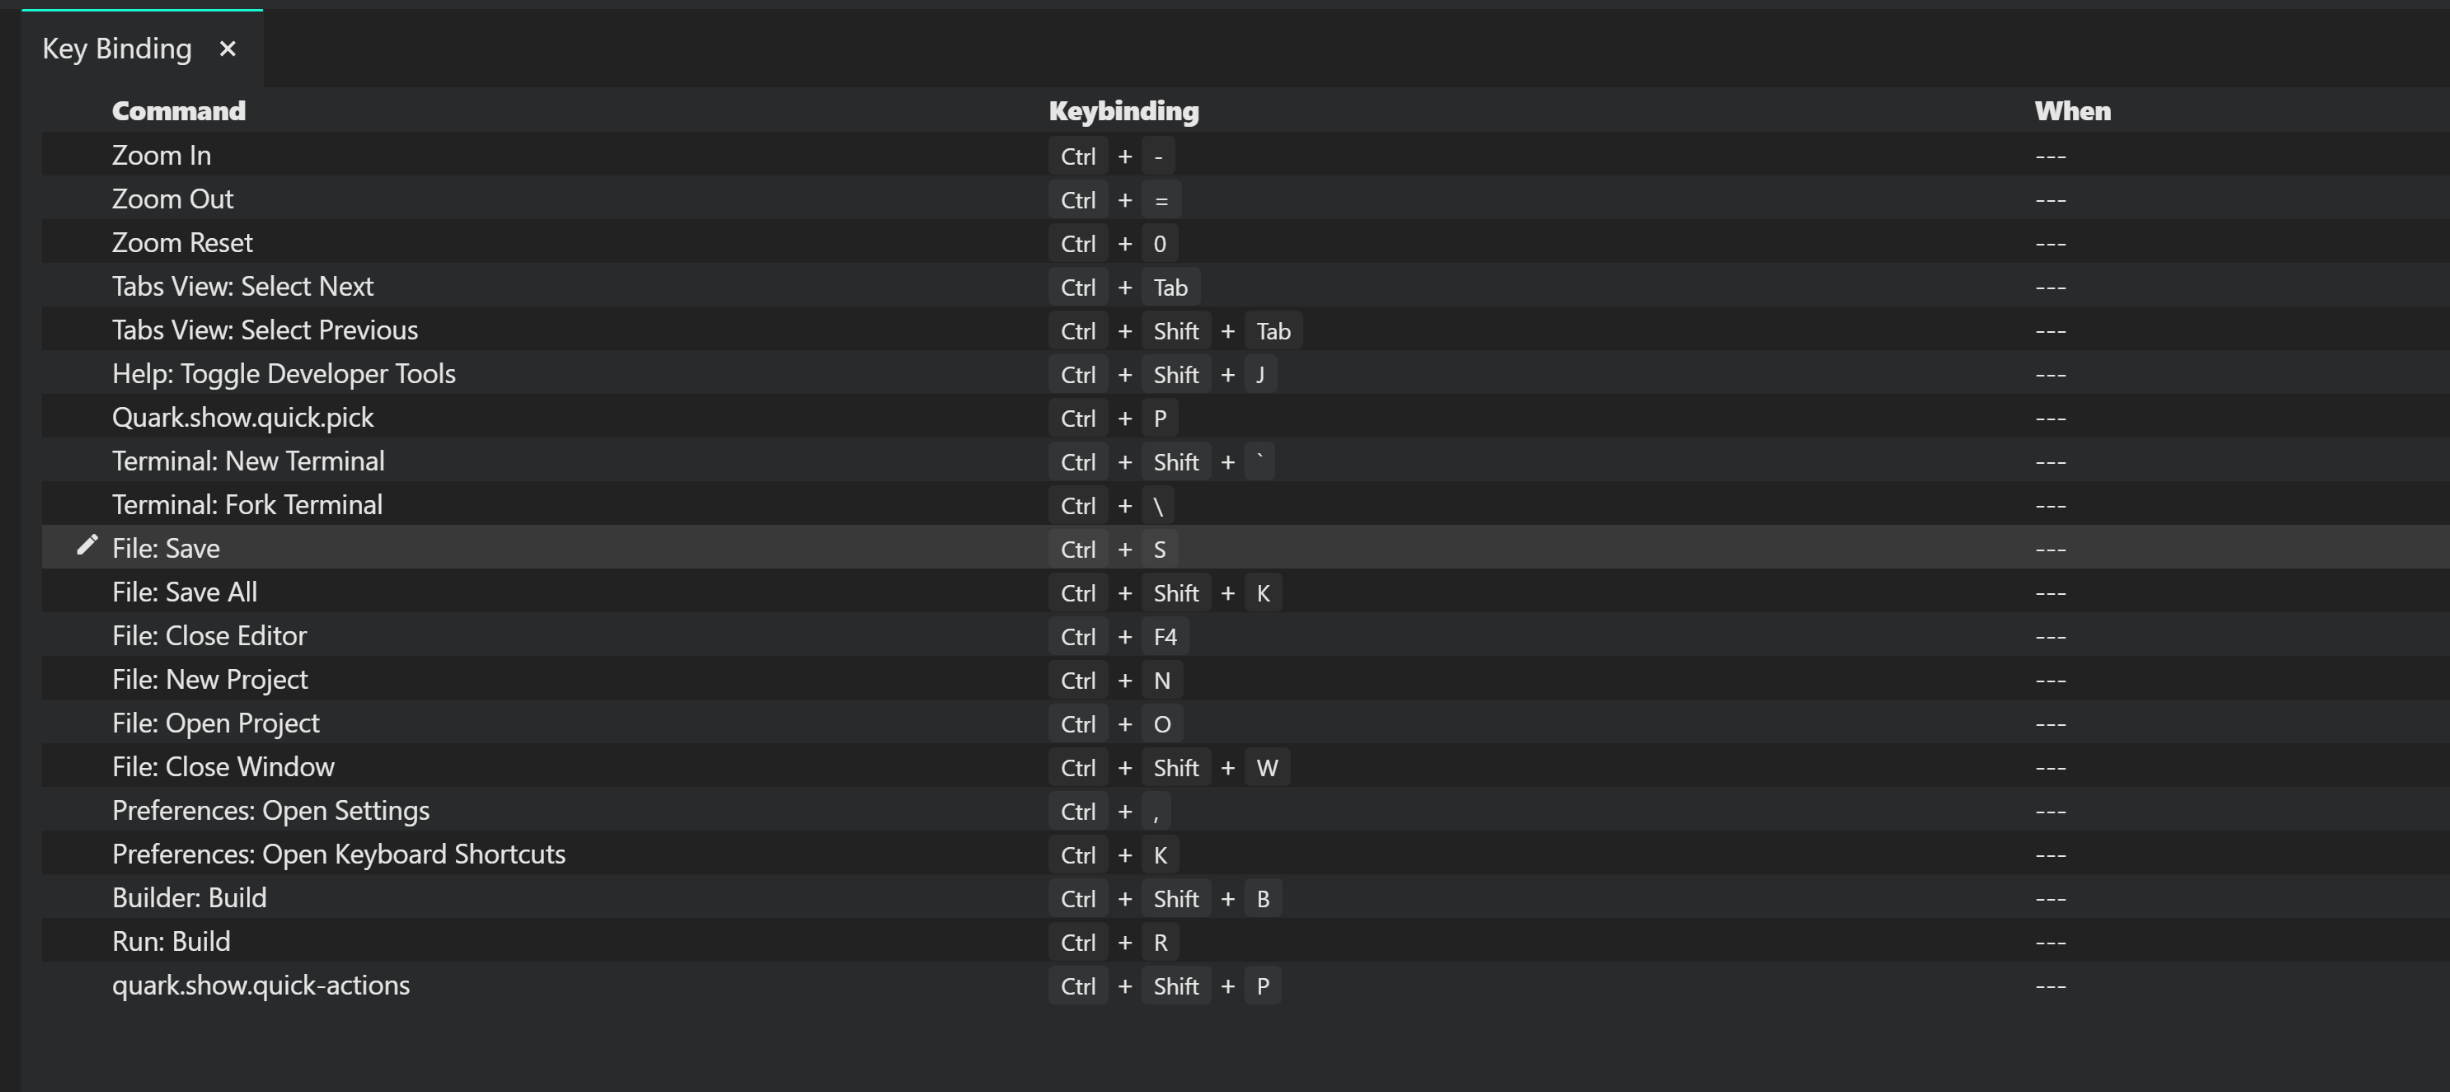
Changing default keyBindings
You can change the default keybindings for the commands.
- Press
Ctrl+kto open the keybinding editing panel. - Click on the edit icon to the left of the command you want to change keybinding for.
- Enter the key combination and press enter to accept.
Installing node packages
Use the inbuilt npm client to install node packages for your projects. Simply type the name of the package and click install on the package that you want to install.
Terminology
You can find definitions for all of the various terms that we use throughout this module in our Glossary.